Much change
9-6-21
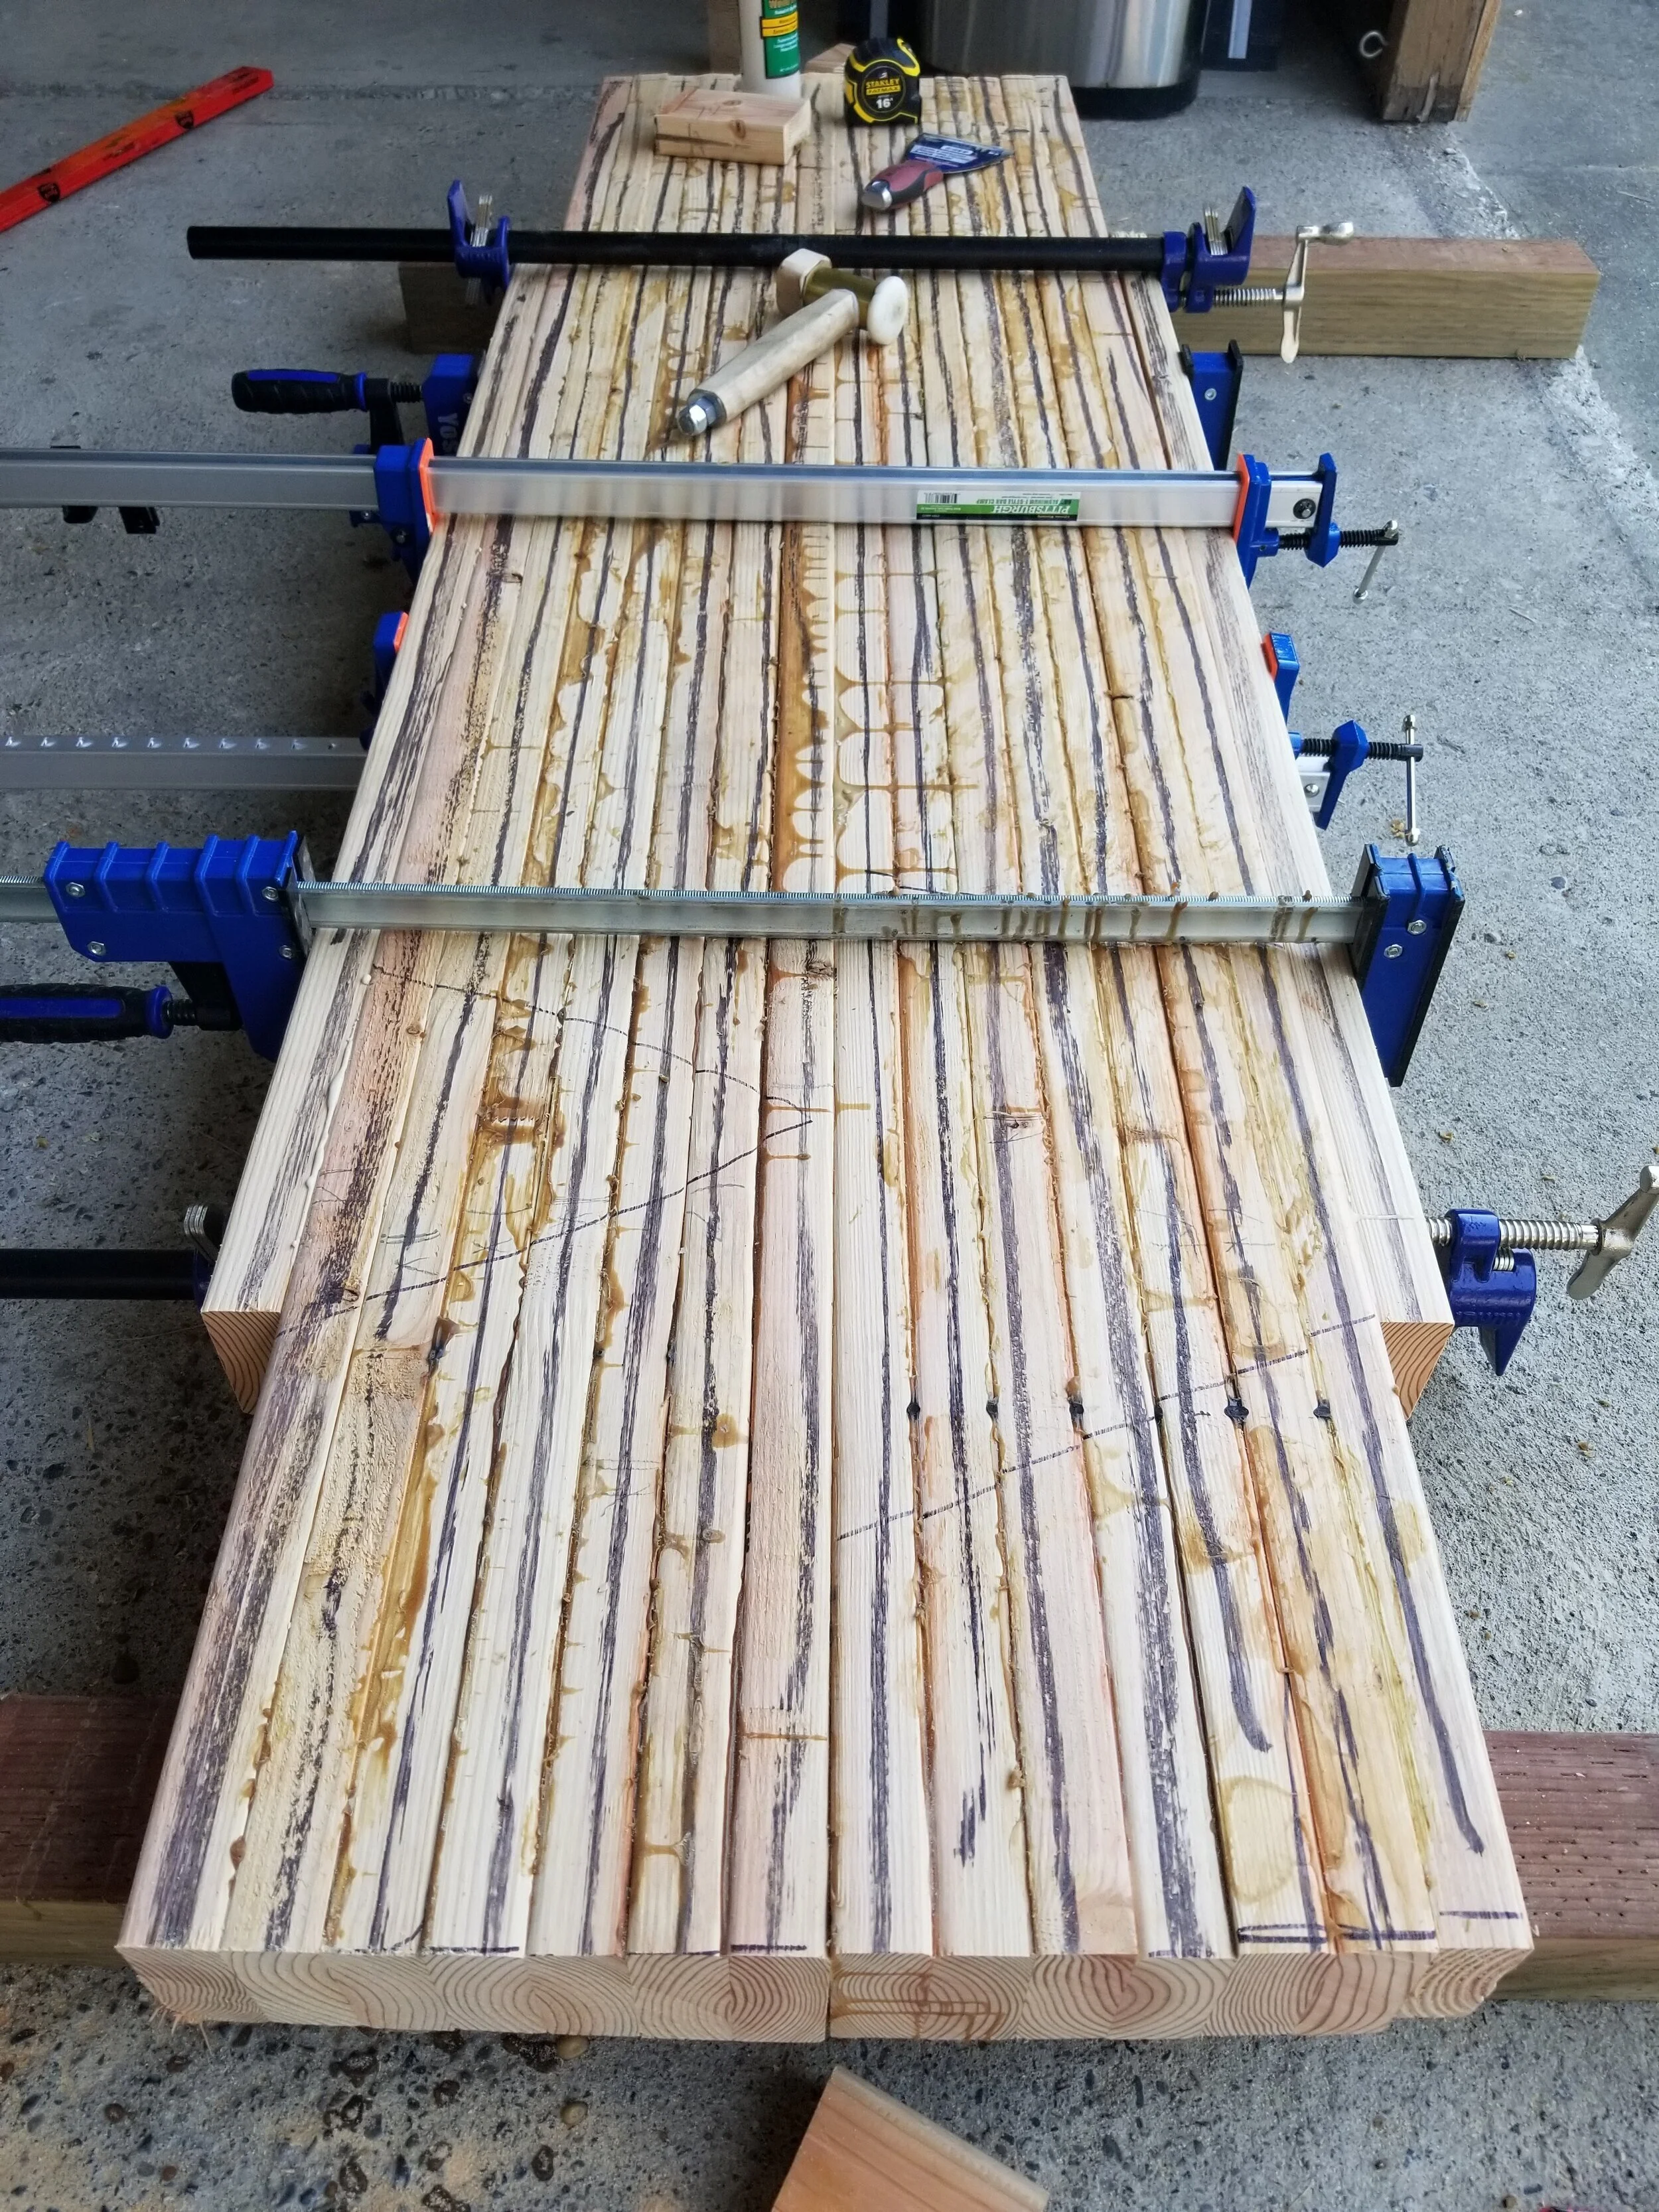
It has been a while since I last posted something here but that is because I’ve been busy. I moved into a new place and started a new job in early August which kept me fairly busy. My new place did not have any work bench or work surfaces so I knew the first real thing I’d have to do to set up the woodshop is build (or buy) myself a bench. When I first started thinking about this lumber prices were through the roof so using 2x4s would cost almost as much as some hardwoods. I priced the hardwood at $600+ for the bench which is a little more than I wanted to pay. While I kept thinking over my options and work bench designs the lumber prices started to fall. This meant building a work bench out of construction lumber became an option that fit both my skill level and price tag. Twice I went and bought a bunch of 2x4s and paid $4 each the first time and $3 each the second, with the total lumber cost staying under $100.
I’m not sure what the official name is for my work bench style, but I took inspiration from other construction lumber workbenches I saw online. I started off by surfacing all of my 2x4s to make sure they were all the same thickness, which came out to be just over 1 inch. You will see why this uniformity was important later on. I then sorted through all the studs and picked out the best edges amongst them. These would become the visible top surface of the bench top. I glued them together in a few batches to form the bench top. I carefully left 4 gaps near the corners, where the legs will stump in later on. Once the entire bench top was glued up I started planning the top surface by hand. Let me tell you that was a lot of work, made worse by the heat wave we are having where I live. I did it by hand partially because I did most of the planning on week days and didn’t want to make too much noise for the neighbors, partially because I wanted to “understand” the wood bench top as I cleaned it up, and mostly because I don’t really have any power tools that could cleanly do the job. Once I was happy with how the top looked I carefully flipped the slab over to work on what would become the bottom of the work bench top. I really didn’t want to spend as much time and sweat as I did for the top surface so I broke out my little electric hand planer. It made for quick and dirty work. Very quick, very dirty, but who cares, this is the bottom, few will ever see it.


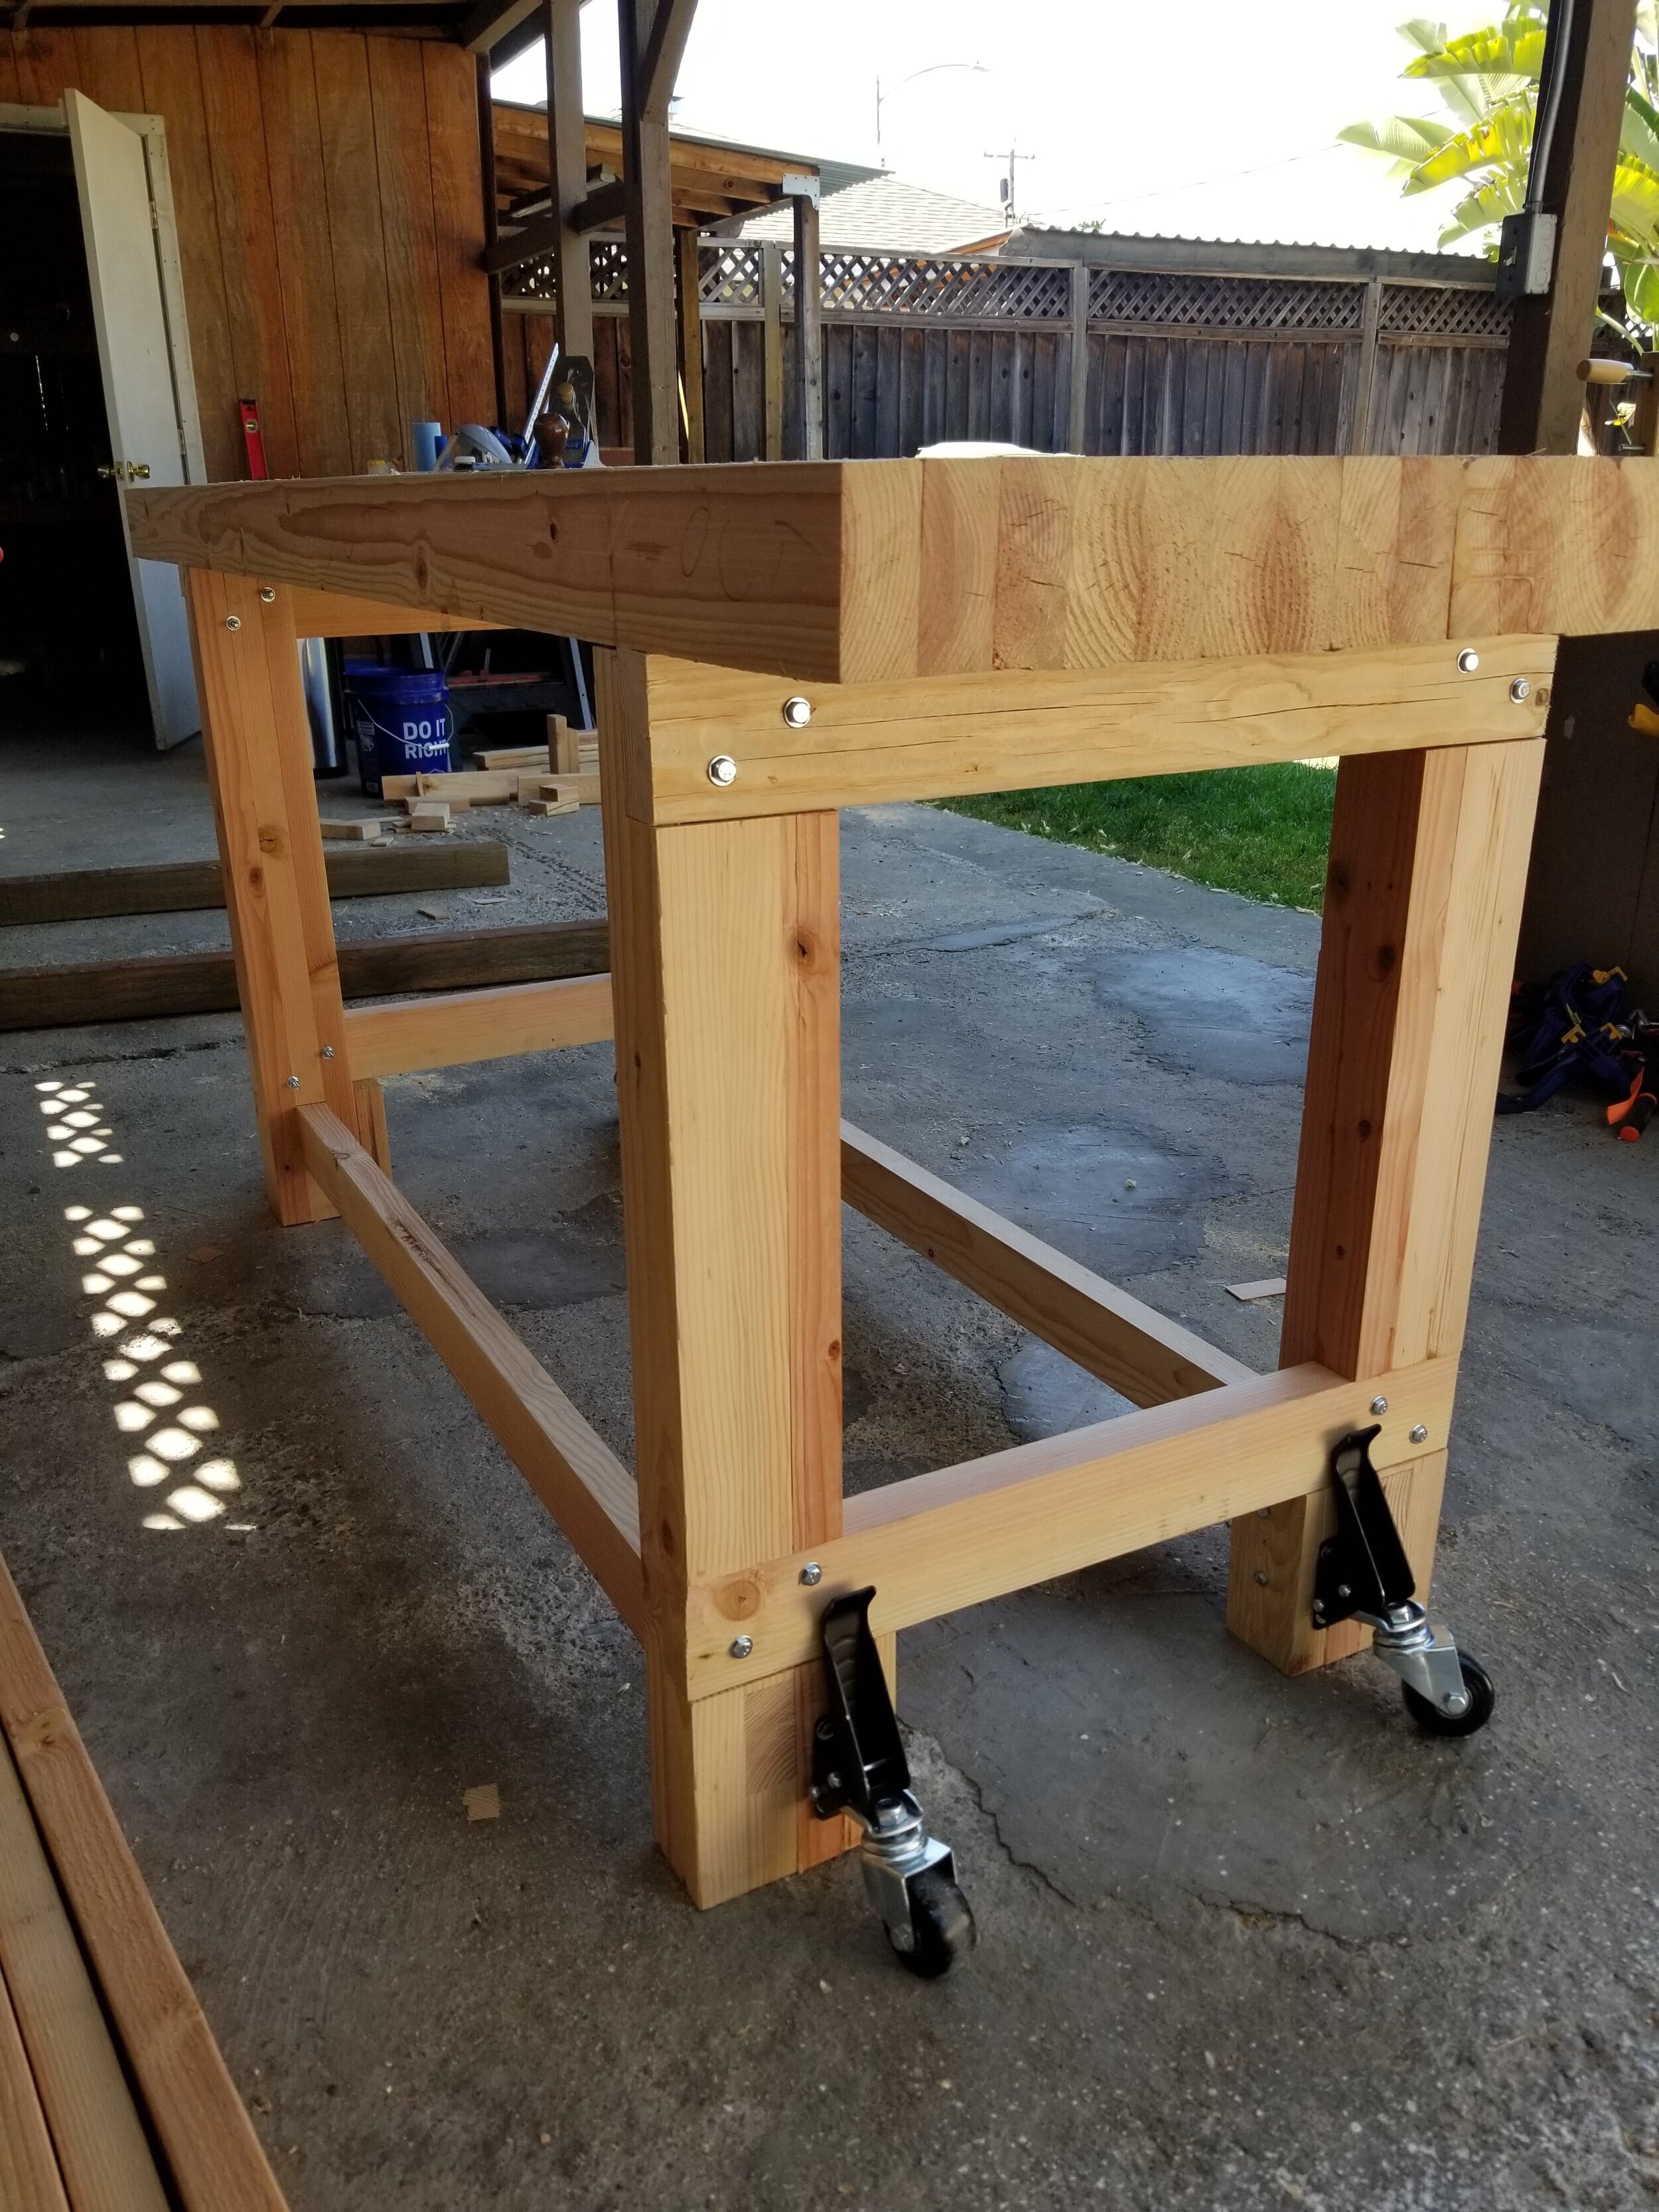
Next I worked on the legs. I used more of those studs I cleaned up at the beginning and placed them in such a way so they formed a tenon at the top and had a mortise on the bottom. That’s fancy woodwork talk for a part that pokes out at the top and a hole at the bottom. The tenons will go into the gaps (another mortise) I had prepared on the work bench top. The mortise on the legs will fit a stretcher to go between 2 legs, improving the stability of the work bench. All these fancy sounding bits were easy to make since I was laminating a bunch of stuff of equal thickness. This also made it easy since any of the 4 legs I prepared could go into any of those 4 gaps I had prepared. I did have to chop out some parts of the legs so that I could add more stretchers, but going 90º to the ones previously mentioned. I went ahead and used my table saw for these cuts, as well as cutting down all of the stretchers to a bit longer than final length.
Now that all the parts were built and ready it was time to assemble. I glued and screwed the shorted stretchers in place as these were meant to be permanently affixed. I then added the 2 long stretchers in their place, completing the legs of the workbench. Now I was ready to attach the legs to the top by inserting all the leg tenons into the 4 mortises in the bench top. The entire work bench was upside down for this to make my life easier but meant I now had to flip over my work bench. Easier said than done when you now live by yourself and weigh almost nothing. I used some moving straps to help me not drop it as I tip it right side up, as well as some left over lumber to protect the work bench as I inevitably drop it. I went slowly and carefully and only slightly dropped it as I flipped the bench right side up. I then attached some flippy wheels so that I could move the work bench. I would not be able to really move the bench without. Trust me, I tried. I still have a few more things to do like add some vises, dog holes, do some general cleanup and add a simple finish, but those will come later.